![]() One of the really nice features of Tulip is its support for Tables. With Tulip Tables, you can easily build a database, and then read and write data to it from within your Tulip apps - and do all of that without writing a single line of code.
One of the really nice features of Tulip is its support for Tables. With Tulip Tables, you can easily build a database, and then read and write data to it from within your Tulip apps - and do all of that without writing a single line of code.
You can also access Tulip Tables remotely using the Tulip API. The Tulip API is easy to use, and provides access to both the data stored in the tables and metadata (data about the database itself, including a list of tables in your account's database, and the fields in each table).
I recently spent some time experimenting with the Tulip API, and specifically with Xojo. I wanted to see what it would take to develop an external application that integrates with Tulip via the Tulip API. What I found was that it is incredibly easy to do.
In this post, I'll discuss Xojo, explain what it is, and why I think Tulip developers might want to check it out. I'll also share a simple Xojo-based app that I've developed called the Tulip API Explorer. You can use the app to explore the Tulip API, and potentially reuse some of the code in it to build your own Xojo-based apps that integrate with Tulip.
But first, here's a short video that shows how the Tulip API Explorer works, and some of the Tulip API calls that you can make with it.
What Is Xojo?
![]() Xojo is a cross-platform application development tool. You can use it to develop desktop apps (for macOS, Windows, Linux), mobile apps (currently only for iOS, but Android support is on the way), Web apps, and console apps. You can even use it to develop apps that run on the Raspberry Pi.
Xojo is a cross-platform application development tool. You can use it to develop desktop apps (for macOS, Windows, Linux), mobile apps (currently only for iOS, but Android support is on the way), Web apps, and console apps. You can even use it to develop apps that run on the Raspberry Pi.
While Tulip is a "no-code" application development platform, Xojo is a "low-code" application development platform. If you're a Tulip developer who is interested in taking the next step into software development, then you should check out Xojo.
With Xojo, you can build apps, and then run them in debug mode for as long as you'd like, all at no charge. If you reach a point where you'd like to build (compile) an app and run it as an executable, then you'll need to purchase a license. (As of this post, Xojo Lite licenses are available for $149 USD.)
To learn more about Xojo, visit https://xojo.com.
Downloading Xojo and the Tulip API Explorer Project File
If you'd like to follow along with the steps that I describe below, you should first download Xojo and install it.
Next, download the Xojo project for the Tulip API Explorer, which is available here:
https://tdietrich-opensource.s3.amazonaws.com/tulip/tulip-table-api-explorer.xojo_binary_project.zip
And finally, unzip the downloaded file, and then double-click the project file ("tulip-table-api-explorer.xojo_binary_project"). If all goes well, Xojo will open and load the project.
Creating a Tulip Bot
In order to use the Tulip API, you need to create what Tulip refers to as a "Bot." You can learn about how to do that in this Tulip Knowledge Base article.
When you create a Bot, Tulip will assign it an API key and secret, and will also give you an "Auth Header." Be sure to save that information in a safe place - and especially the "Auth Header," because that's what you'll need in order to call the Tulip API from the Xojo app.
Calling the Tulip API From Xojo
In Xojo apps, we normally call Web APIs using something called the URLConnection class. However, I've created a special version of URLConnection (a "subclass" of it) called "tulipAPIConnection," which is designed specifically for calling the Tulip API.
To use an instance of the tulipAPIConnection class, you first configure it the "Auth Header" value of your Tulip Bot. In the Xojo project file for the Tulip API Explorer app, you'll see that I'm setting the authHeader property of the tulipAPIConnection instance ("tulipAPIConnection1") in the "Open" event of the app's main window ("Window1"). I'm also setting the default URL value for the app.
Here's a screen shot of the Xojo project showing where those values are set.
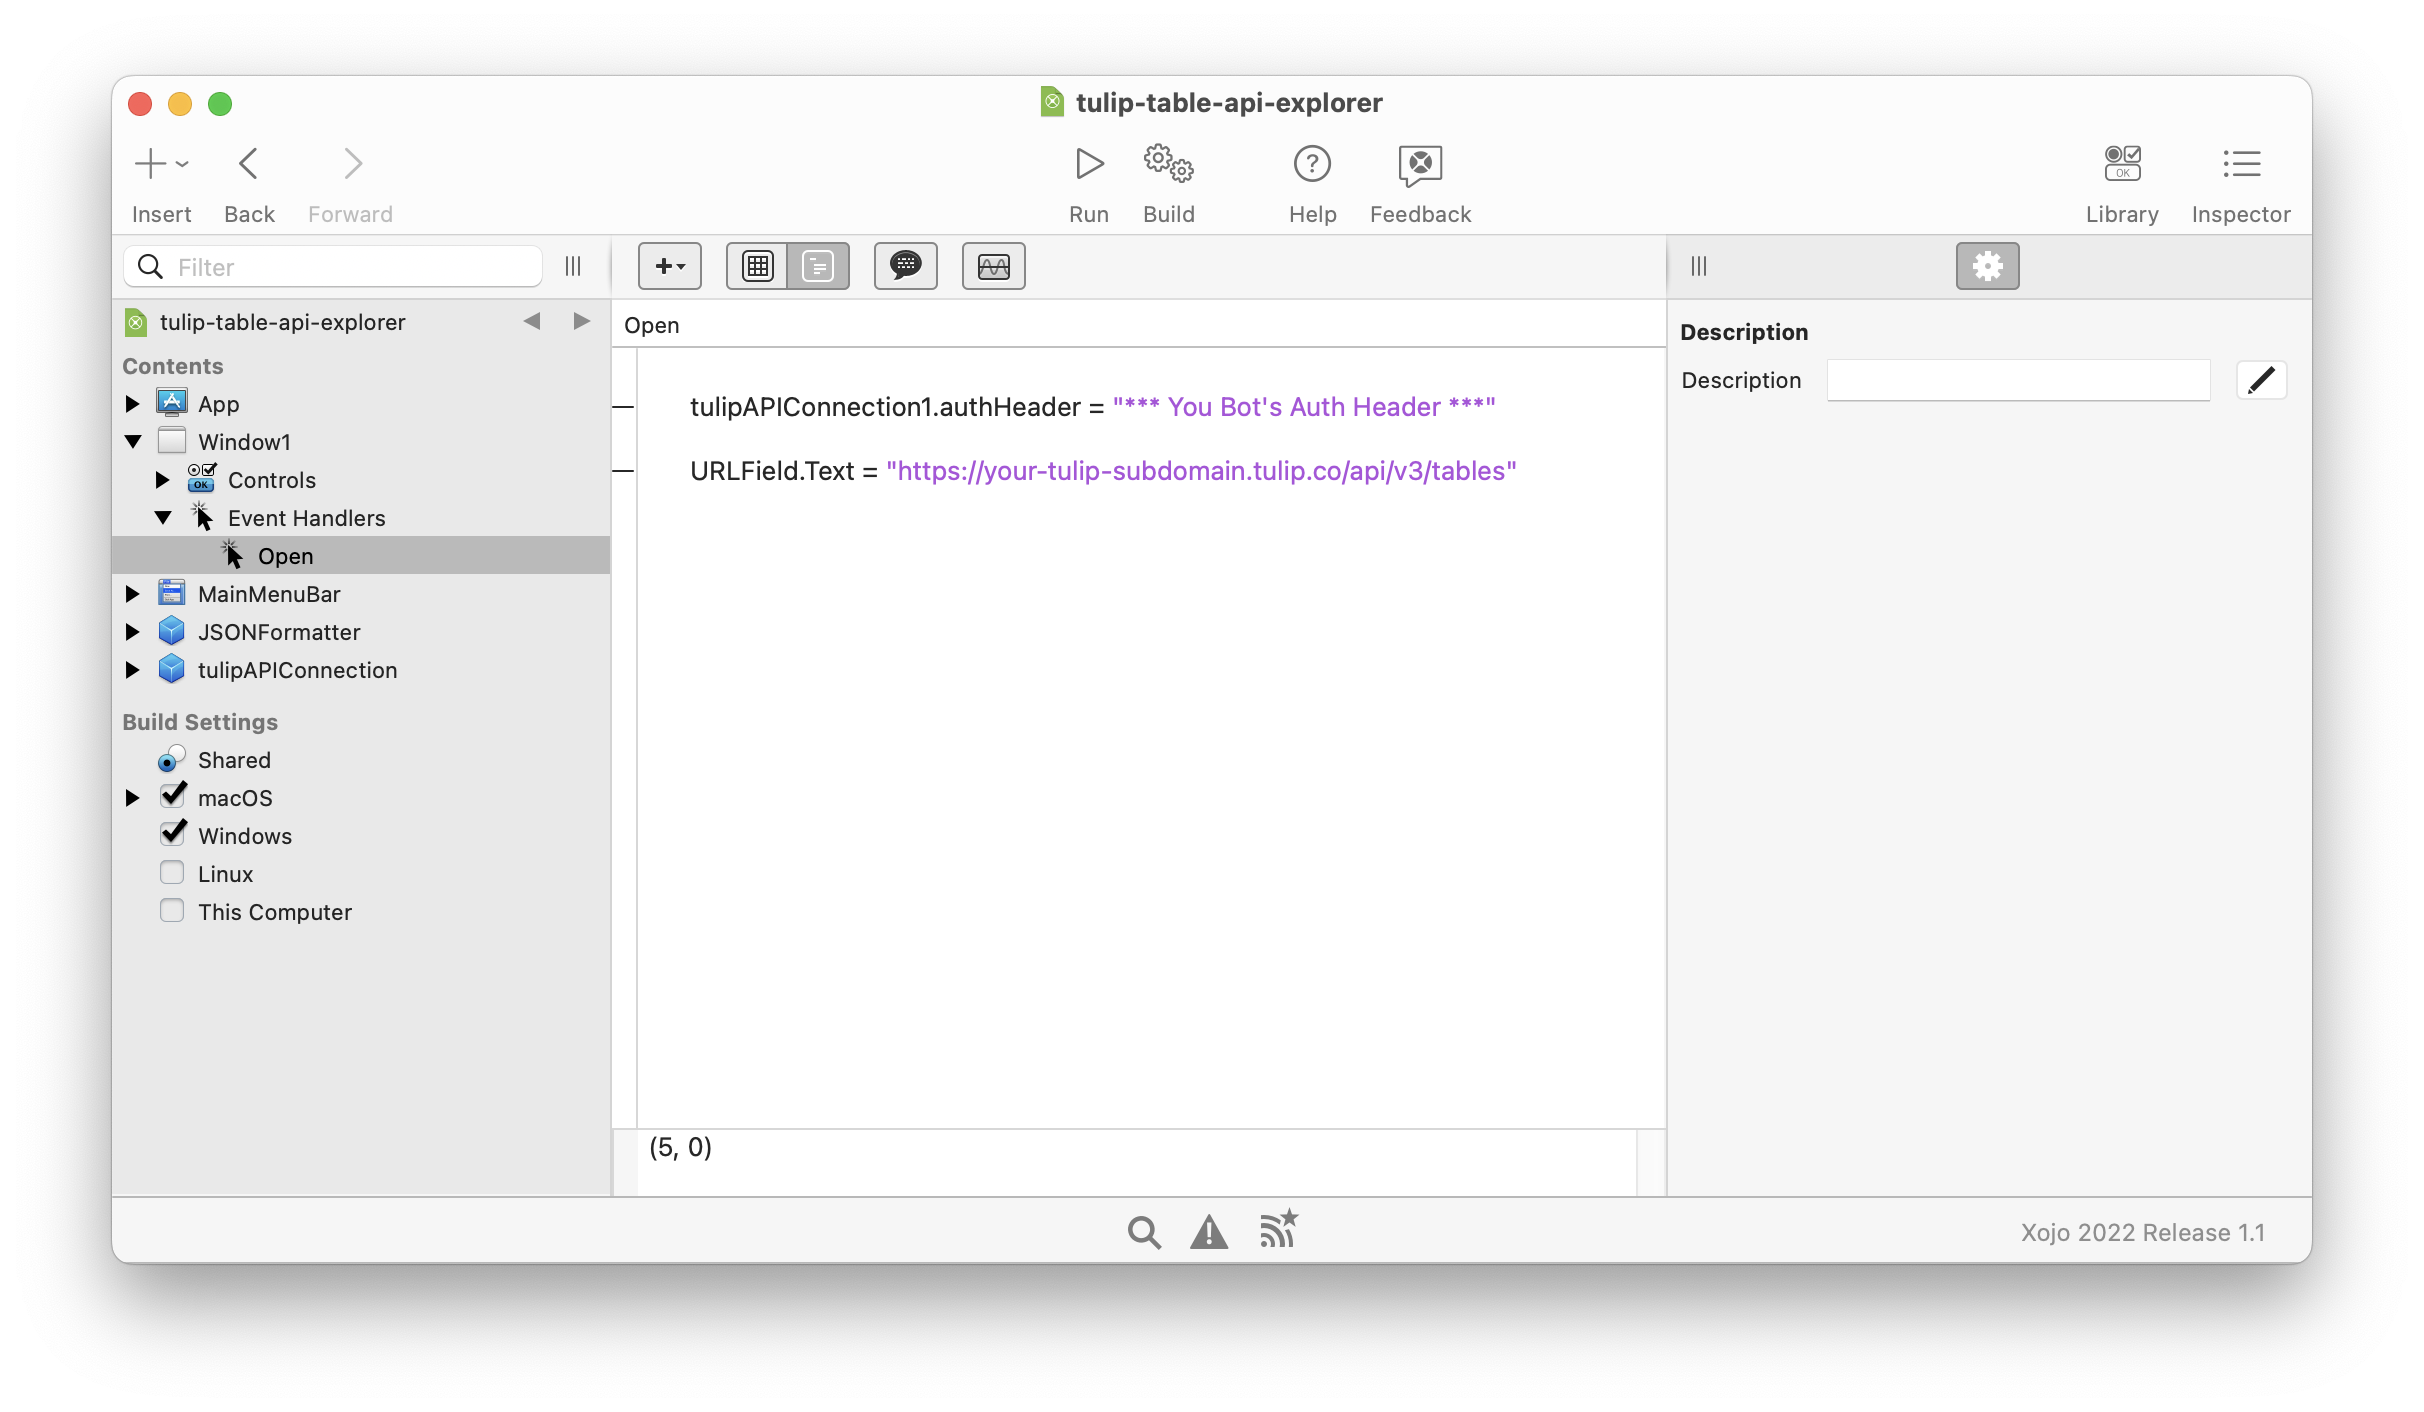
Click the image to view a larger version.
To use the app with your Tulip Bot / account, you'll want to set "tulipAPIConnection1.authHeader" to your bot's Auth Header, and then set "URLField.Text" to a URL based on your Tulip account's subdomain.
After the tulipAPIConnection instance is configured, calling the Tulip API is as simple as specifying an HTTP method, the URL, and, depending on the type of call being made, a JSON-encoded payload. You then call the tulipAPIConnection's RequestSend method.
In the Tulip API Explorer app, you'll see that I set the tulipAPIConnection instance's properties, and call the RequestSend method, in the SendRequestButton's "Action" event handler. In other words, those things happen when the button is clicked. This is very similar to how we setup event handler's on buttons in our Tulip apps.
If you're going to use the tulipAPIConnection in your own app, then you'll also likely want to configure the instance's "Content Received" event handler, and possible its "Error" handler as well. The "Content Received" event fires when a response is received from the Tulip API, while the "Error" event occurs if something goes wrong (such as a timeout).
After you've configured the app, you can run it. To do so, click the "Run" button in Xojo's toolbar. The app will launch and run in debug mode, and you can then start making API calls.
Sample Tulip API Calls
You can see examples of some of the more common Tulip API calls in the video above. But here are some notes that might help you make your own calls.
Get A List of Tables
• Method: GET
• URL: https://your-tulip-subdomain.tulip.co/api/v3/tables
Get Information About A Table
• Method: GET
• URL: https://your-tulip-subdomain.tulip.co/api/v3/tables/your-table-id
Get Records In A Table
• Method: GET
• URL: https://your-tulip-subdomain.tulip.co/api/v3/tables/your-table-id/records?limit=10
You can specify the total number of records to be returned by using the "limit" URL parameter. The default is 10, and the maximum is 100. You can also use the "offset" URL parameter to paginate the results. And there are several other helpful URL parameters as well, including sortBy, sortDir, includeTotalCount, as well as filters. Refer to the API Documentation for details.
Create A Record
• Method: POST
• URL: https://your-tulip-subdomain.tulip.co/api/v3/tables/your-table-id/records
• Example Request Body: {"id": "4", "pcmrk_description": "Hello, Tulip." }
Update A Record
• Method: PUT
• URL: https://your-tulip-subdomain.tulip.co/api/v3/tables/your-table-id/records/your-record-id
• Example Request Body: {"pcmrk_description": "Hello again." }
For more comprehensive and detailed examples, refer to the Tulip API Documentation, which you can get to by navigating to you account's settings, selecting Bots, and clicking the API Documentation link in the top right corner of the window.
Wrapping Up
I hope you've found this post, and the sample Xojo project, to be helpful.
As I mentioned above, if you're a Tulip developer that is interested in programming, then exploring Xojo might be a good next step for you. And if you're a Tulip developer that already has some programming experience, then you might also be interested in exploring Xojo.
One more thing: While the Tulip API Explorer example app is a desktop application, the tulipAPIConnection class can also be used to develop mobile, Web, and console apps. So with Xojo, the tulipAPIConnection class, and the Tulip API, you can develop all types of solutions that extend and complement your Tulip apps.