I've been asked many times - mostly by NetSuite administrators and business analysts - if it's possible to add links to the results that are displayed in the SuiteQL Query Tool. It's possible, and it's actually easy to do.
In this post, I'll show you how you can add links to queries that are based on transactions. But first, here's a short animation that shows the technique in use.
Click the image to view a larger version.
Adding Edit and View Links
Let's start with the most common request that I get, and that is to add links to the results of queries that involve transactions. In this example, I'm adding links based on Sales Orders, and I'm filtering the results to include only the first 10 sales orders that occurred in January 2021, in reverse chronological order based on the transaction date.
SELECT TOP 10
	'<a href="/app/accounting/transactions/salesord.nl?id=' || Transaction.ID || '&e=T" target="_new">Edit</a>'
	|| ' | '
	|| '<a href="/app/accounting/transactions/salesord.nl?id=' || Transaction.ID || '" target="_new">View</a>'
		AS Links,
	Transaction.TranID,
	Transaction.TranDate,
	BUILTIN.DF( Transaction.Entity ) AS Customer
FROM
	Transaction
WHERE
	( Transaction.Type = 'SalesOrd' )
	AND ( Transaction.TranDate BETWEEN TO_DATE( '2021-01-01', 'YYYY-MM-DD' ) AND TO_DATE( '2021-12-31', 'YYYY-MM-DD' ) )
ORDER BY
	Transaction.TranID DESC
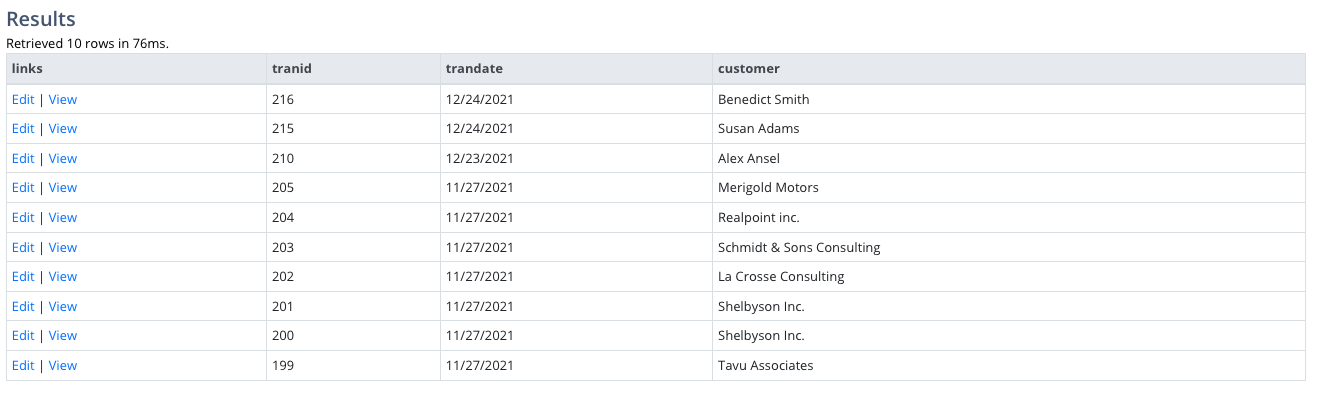
The first column ("Links") is a calculation that uses the Oracle Concatenation Operator ("||" or "double pipe"). I'm using it to create HTML links based on a combination of static text and the transaction's internal ID.
There are actually two links that are generated - one to view the transaction, and a second to edit it. The two links are separated with spaces and a pipe character. The result looks something like this.
Click the image to view a larger version.
Adding Print Links
Adding a link that you can use to print a transaction is a little trickier, because it will be based on your specific NetSuite account's configuration. Here's an example.
SELECT TOP 10
	'<a href="/app/accounting/transactions/salesord.nl?id=' || Transaction.ID || '&e=T" target="_new">Edit</a>'
	|| ' | '
	|| '<a href="/app/accounting/transactions/salesord.nl?id=' || Transaction.ID || '" target="_new">View</a>'
	|| ' | '
	|| '<a href="/app/accounting/print/hotprint.nl?regular=T&sethotprinter=T&formnumber=118&whence=&printtype=transaction&trantype=salesord&recordtype=&label=Sales%20Order&id=' || Transaction.ID || '" target="_new">Print</a>'
		AS Links,
	Transaction.TranID,
	Transaction.TranDate,
	BUILTIN.DF( Transaction.Entity ) AS Customer
FROM
	Transaction
WHERE
	( Transaction.Type = 'SalesOrd' )
	AND ( Transaction.TranDate BETWEEN TO_DATE( '2021-01-01', 'YYYY-MM-DD' ) AND TO_DATE( '2021-12-31', 'YYYY-MM-DD' ) )
ORDER BY
	Transaction.TranID DESC
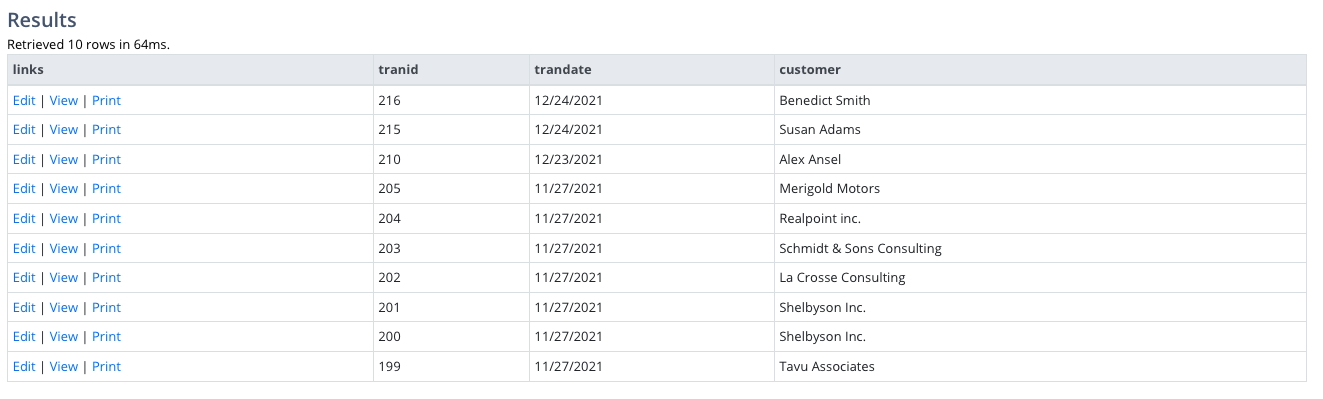
As you can see, I've modified the calculation for the Links column, and added a slightly more complex and longer link. In your NetSuite account, it's highly likely that the form number ("formnumber") URL parameter will be different. An easy way to determine your form number is to view a list of sales orders, and hover over the "Print" link.
The query results will look something like this.
Click the image to view a larger version.
Adding Links to the Customers
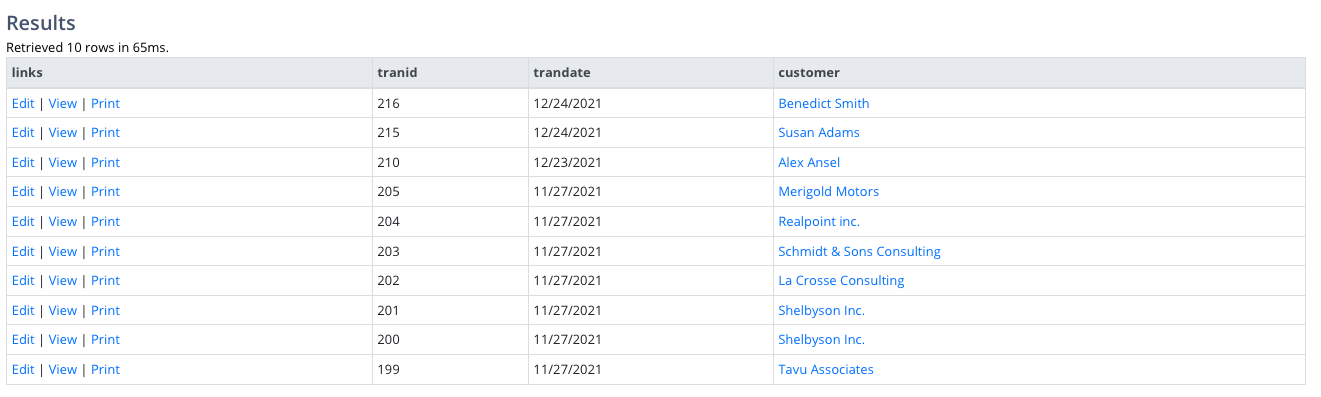
Let's add one more link to the results. This time, I'll add a link to the customer that is associated with the sales order - and apply the link to the customer name.
Here's the modified query.
SELECT TOP 10
	'<a href="/app/accounting/transactions/salesord.nl?id=' || Transaction.ID || '&e=T" target="_new">Edit</a>'
	|| ' | '
	|| '<a href="/app/accounting/transactions/salesord.nl?id=' || Transaction.ID || '" target="_new">View</a>'
	|| ' | '
	|| '<a href="/app/accounting/print/hotprint.nl?regular=T&sethotprinter=T&formnumber=118&whence=&printtype=transaction&trantype=salesord&recordtype=&label=Sales%20Order&id=' || Transaction.ID || '" target="_new">Print</a>'
		AS Links,
	Transaction.TranID,
	Transaction.TranDate,
	 '<a href="/app/common/entity/custjob.nl?id=' || Transaction.Entity || '" target="_new">' || BUILTIN.DF( Transaction.Entity ) || '</a>' AS Customer
FROM
	Transaction
WHERE
	( Transaction.Type = 'SalesOrd' )
	AND ( Transaction.TranDate BETWEEN TO_DATE( '2021-01-01', 'YYYY-MM-DD' ) AND TO_DATE( '2021-12-31', 'YYYY-MM-DD' ) )
ORDER BY
	Transaction.TranID DESC
The results look like this.
Click the image to view a larger version.
Applying Links to Other Transaction Types
You can use this technique to add links to other transaction types, such as purchase orders, customer invoices, vendor bills, and so on. All you need to is change the URL slightly, based on the transaction type. For example, for purchase orders, the links would look something like this:
/app/accounting/transactions/transaction.nl?id=22979
And if you're adding print links, again, be sure to adjust the print URL based on the form that you use in your NetSuite account.
Applying Links to Other Record Types
To add links to other record types - such as entity-based record types (employees, customers, etc), I suggest looking at the a list of the records, and examining the URLs that the NetSuite UI uses. For example, here's a simple query that adds edit and view links to a query based on Employees.
SELECT
	'<a href="/app/common/entity/employee.nl?id=' || Employee.ID || '&e=T" target="_new">Edit</a>'
	|| ' | ' ||
	'<a href="/app/common/entity/employee.nl?id=' || Employee.ID || '" target="_new">View</a>'
	AS Links,
	ID,
	LastName,
	FirstName,
	Phone,
	Email
FROM
	Employee
ORDER BY
	LastName,
	FirstName
Opening Links In Separate Tabs
In the examples above, all of the links will open in a tab with the ID of "_new." If you'd like for each result to open in its own tab, you can use dynamic values for the href targets.
For example, to open every employee in its own tab, you would use something like this.
SELECT
	'<a href="/app/common/entity/employee.nl?id=' || Employee.ID || '&e=T" target="_employee_edit_' || Employee.ID || '">Edit</a>'
	|| ' | ' ||
	'<a href="/app/common/entity/employee.nl?id=' || Employee.ID || '" target="_employee_view_' || Employee.ID || '">View</a>'
	AS Links,
	ID,
	LastName,
	FirstName,
	Phone,
	Email
FROM
	Employee
ORDER BY
	LastName,
	FirstName
Wrapping Up
In this post, I've shown how you can easily add links to the results that are displayed in the SuiteQL Query Tool. You can apply the technique to nearly all record types. And if you're a NetSuite developer, you can use the technique in your SuiteScript-based applications. I hope you find the technique to be helpful.